Arduino Programming
In this blog, I will be showing my work on the input and output devices on Arduino (tinkercad), and also the Pegasus challenge that my team did for the practical session.
1. Input devices:
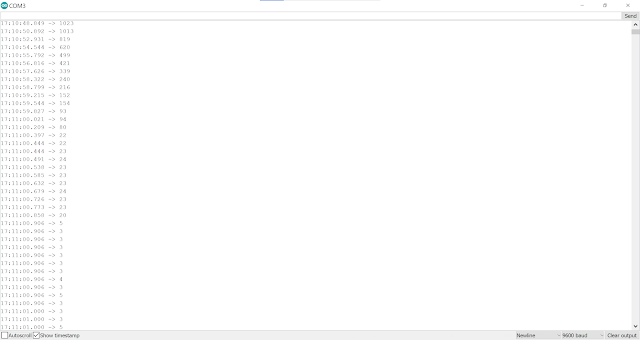
a. Interface a Potentiometer Analog Input to maker UNO
board and measure its signal in serial monitor Arduino IDE.


The screenshot below shows the signal shown in the serial monitor in Arduino IDE:
This is the a video of how it looks like on the Arduino board:
The simulation is shown in the embedded file below:
Here's the link to the tinkercad circuit: https://www.tinkercad.com/things/bu3TgkrUBlP
This is the link to download the Arduino program codes:
b. Interface a LDR to maker UNO board and measure its
signal in serial monitor Arduino IDE.


The example is shown in this video:
2. Output devices:
The simulation is shown in the embedded file below:
Here's the link to the tinkercad circuit: https://www.tinkercad.com/things/8fSJkW0hHMd
This is the link to download the Arduino Program codes:
2. Output devices:
a. Interface 3 LEDs (Red, Yellow, Green) to maker UNO
board and program it to perform something (fade or flash
etc)


The simulation can be shown in the embedded file below:
Here's the link to the tinkercad circuit: https://www.tinkercad.com/things/kLtHzULP9T3
This is the link to download the Arduino Program codes:
b. Interface the DC motor to maker UNO board and
program it to on and off using push button on the board.
This photo shows how the circuit is connected using the Arduino board.

Here's the link to the tinkercad simulation: https://www.tinkercad.com/things/krcZ8wWlBHY
This is the link to download the Arduino Program codes: In conclusion, these are the input and output devices that we are tasked to do on tinkercad.


Upon completing the challenge, we were given two challenges by one of the lecturers. The first challenge is to make both the wings and the tail move simultaneously. The second challenge is to put LED on the unicorn's eye and make it light up. This is what we came up with:

When attempting these challenges, we faced a lot of difficulties mainly because of space constraints, so we have to think of how we are going to solve these problems.
One of the problems is connecting the LED light to the eye of the Pegasus. The breadboard cannot fit into the head of the Pegasus, so we had to use some crocodile clips to connect the LED to the breadboard that is underneath the Pegasus. Another problem we had to solve was the placement of the second servo motor for the tail. Since the space within the body is not huge, we have decided to attach below the Pegasus. Another problem that we encountered is the connection at the breadboard. Since there are so many connections, there will be a lot of wires and it can get quite confusing at times. Therefore, we try to colour code the wires as much as possible. The Arduino and breadboard connections that is underneath the Pegasus are shown below:


The link to the downloadable file is here:
In conclusion, I have learnt a lot about Arduino programming. During the practical lesson, there was an individual competency assessment, which I think I did okay. Through the different challenges and learning packages that were provided to us, I get to learn a lot. Even though it can be quite tedious, but I had a fruitful experience.
I feel that Arduino programming is important because it is the basics of programming, and as the world is moving to a more digital future, I feel that gaining some knowledge of programming can be very useful in the near future. I feel that what makes this Arduino programming interesting is what I can do with it. There are a lot of wonders that I can create with Arduino. By mastering this skill, it will be very useful for the project in this module. My group is making an air-to-water machine. Arduino programming can be used for the digital areas of the machine. Moreover, we can improvise and use more functions of the Arduino board if we want to.
I used to think that programming is very difficult. Now I think that it is very important and very useful for our projects. I feel that I have learnt a lot through these lessons and learning packages. So next I will continue to discover more about Arduino because of the amazing things that it can do. I feel that I can learn more on Arduino online, so that I can fully understand what Arduino is capable of. Then, I can create whatever I am interested in next time.
Comments
Post a Comment